Canvas
Canvas itself is accessible, but the content you post to it may not be. Thankfully, the program offers a wide variety of tools you can take advantage of to help make the content you post accessible as well.
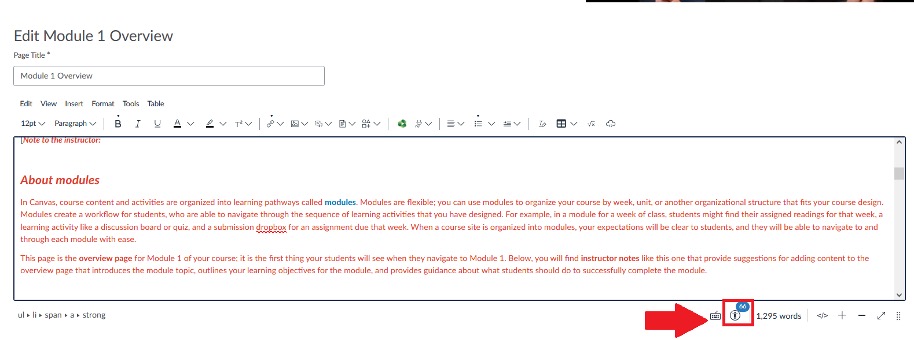
While editing content, you can use Canvas’s accessibility checker:

This checker is just below the rich content editor will allow you to see issues like contrast and whether your images have alt text. This checker is not infallible but is a great place to start. If you’re uploading images, it’s advisable to check the alt text of those images manually.
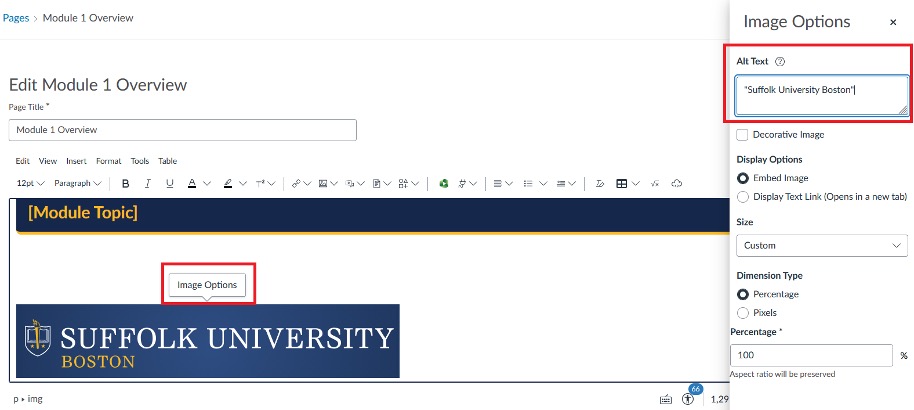
To add alt text to an image, simply select the image in the rich content editor and click the “Image Options” popup.

Alt text should primarily focus on usability and avoid flowery descriptions. Be direct and to the point, and don’t hesitate to mark images decorative if their inclusion isn’t critical to understand a slide. For images of text, alt text should simply be the text in quotation marks.
See our suggestions on how to make good alt text on the Accessible Content Guide page.
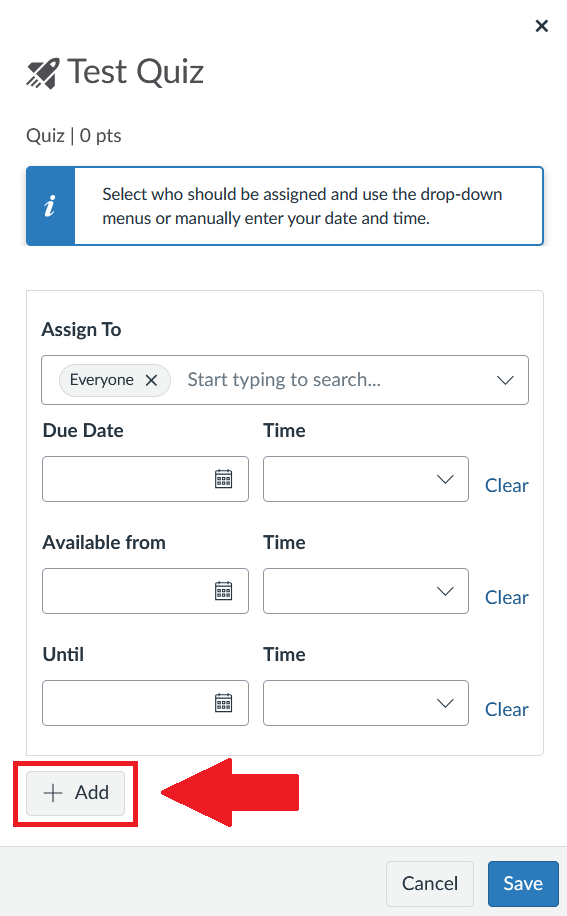
If your student is taking an exam at a different time than the rest of the class (because they’re working with the Office of Disability Services, were sick, etc.) you can change that in the “Assign To…” window.
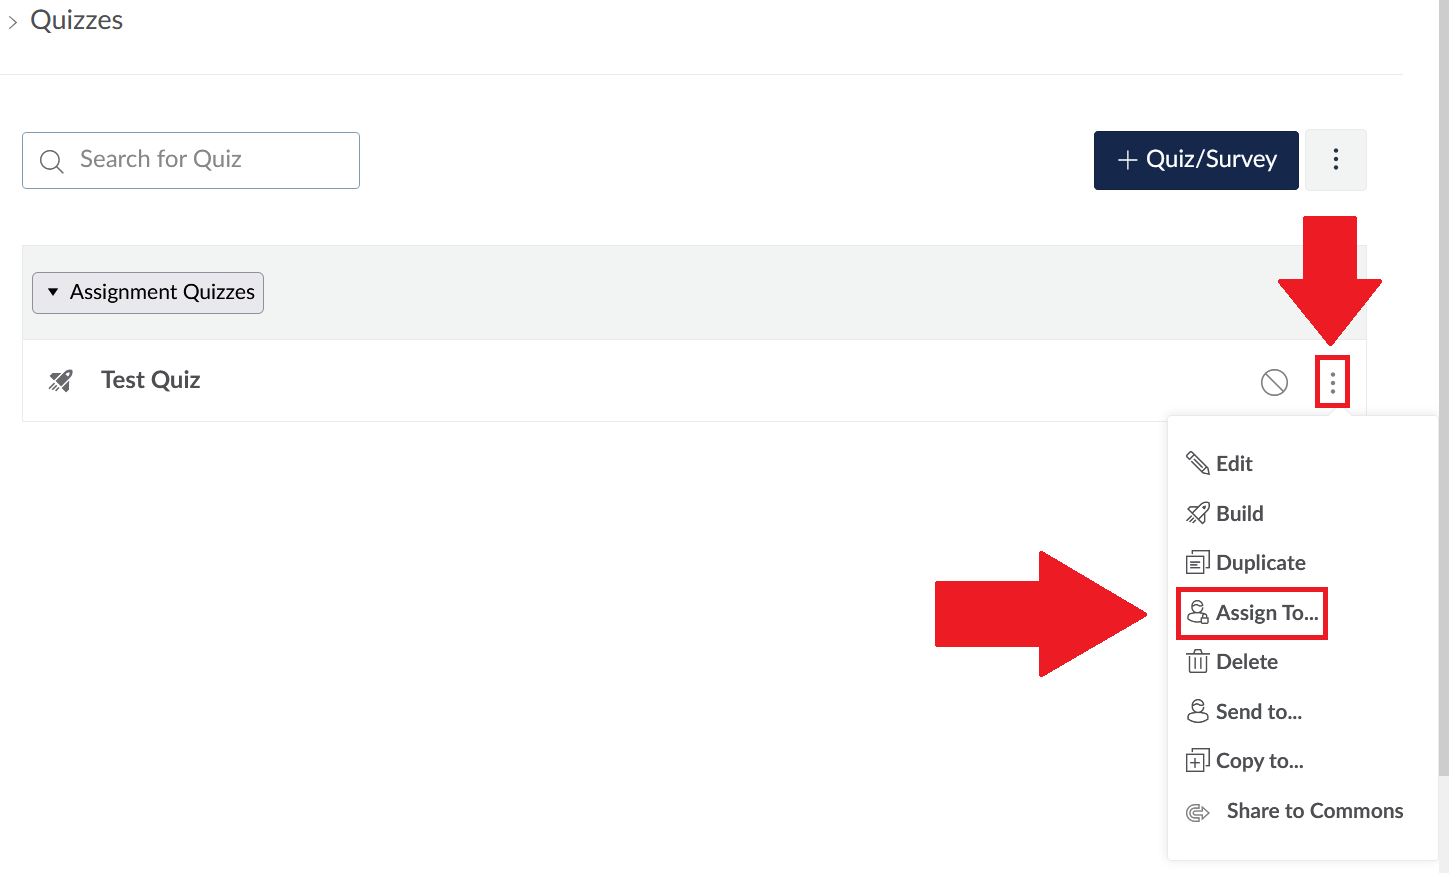
From there, you can add a new assignment for the student in question. Just click the “Add” button, and then you can specify a new time for their exam to start.
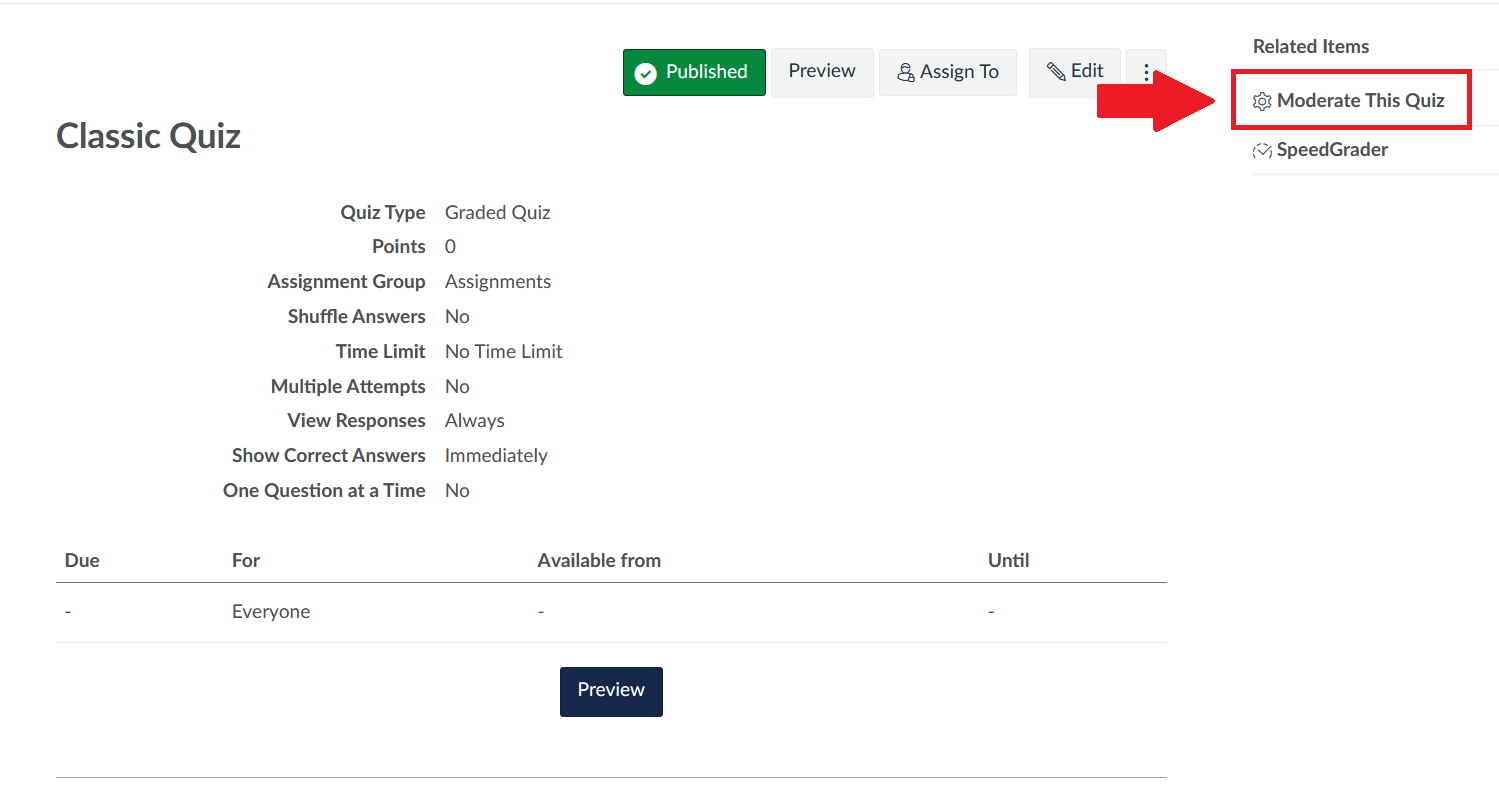
If you set a time limit for an exam, and a student has an exam time extension accommodation, you can extend their time in the moderation tools. You can access these tools by clicking “Moderate this Quiz” for classic quizzes after the quiz has been published:
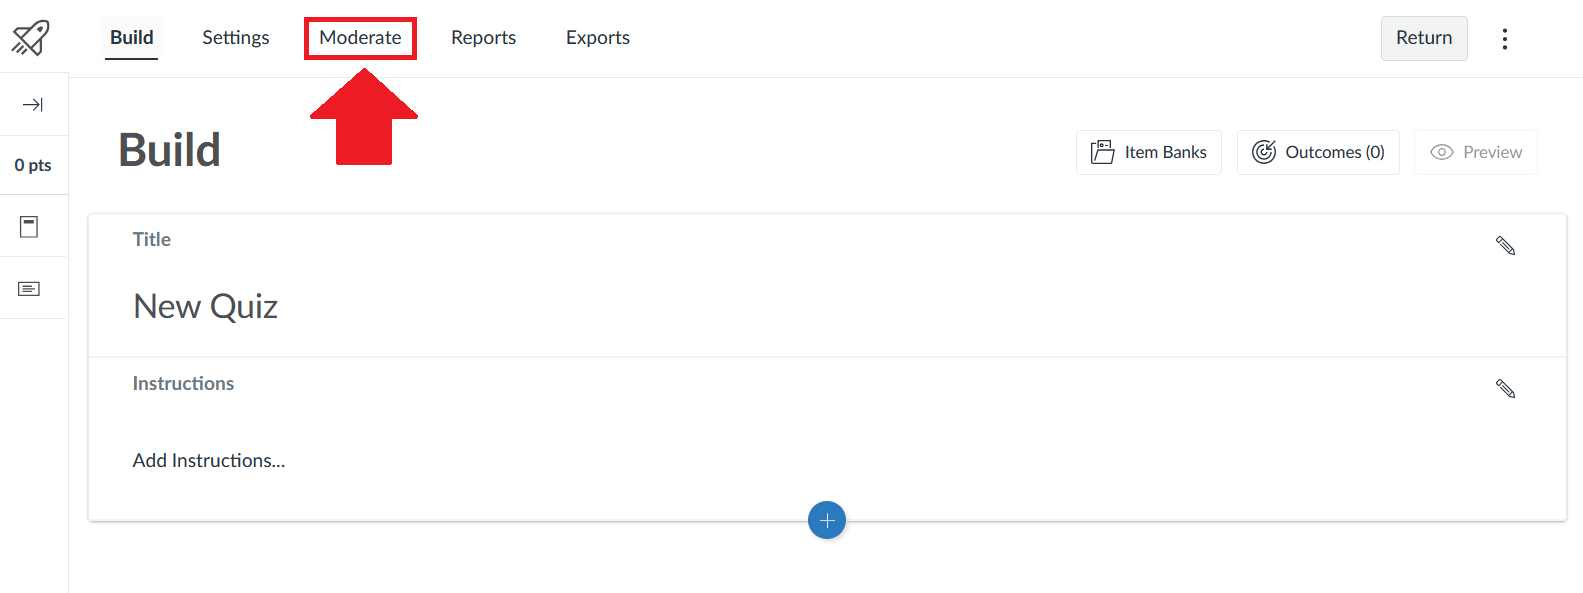
Or, by opening the moderate menu while building a new quiz:
When in the moderate window, just select the student and press the pencil icon to edit:
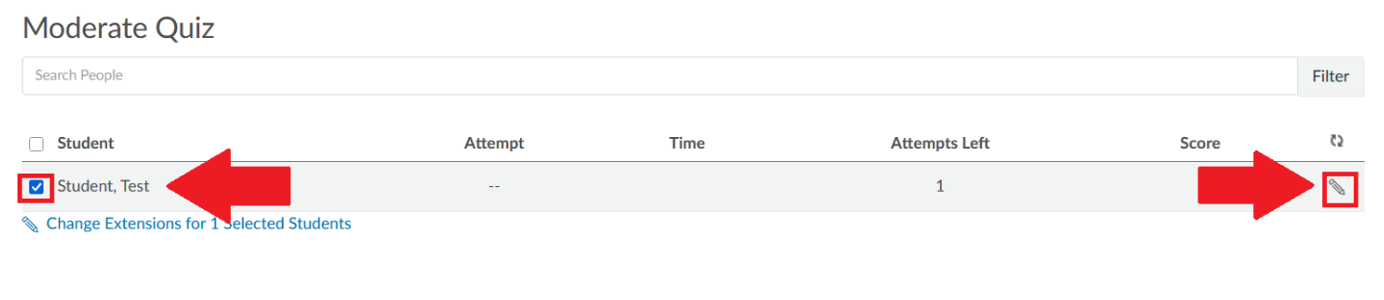
From there, you can add extra time to match the accommodation in the student’s letter. Please note, if you’ve set your exam to only be available for a limited time, you may also need to change the time it’s available by using the "Assign to...” window.
When uploading material to Canvas, one small thing that can make a big difference is the name of the file. Sometimes documents come with long or confusing file names that make it harder for students to navigate. This is especially true for students using screen readers or other text-to-speech technologies, who will have the file names read aloud to them.
Make sure that your file names are clear and consider using a shared naming convention for all your files (for instance “Chapter/Article Title, Lead Author”). This can significantly improve navigation for all students, helping them keep track of files even after they’ve downloaded them to their own computer.
Modules and Pages are the primary ways to organize content in Canvas and are meant to be used in distinctly different ways. Playing into the strengths of each of these can help students more adeptly navigate your course.
Modules are primarily for time sensitive content (readings, assignments, etc.) that is meant to coincide with a particular class or set of dates. Modules are collapsable and allow students to easily gauge what they should be studying and when.
Pages, on the other hand, are designed for content that is more generally relevant and not specifically tied to a single discussion or topic (writing guides, formula sheets, long term projects, etc.) and ideally should be used for content you expect students to keep coming back to during the course.
Instead of providing students with a syllabus as a PDF or Word Document, consider using the built-in syllabus tool on Canvas. Canvas’s syllabi come with a number of distinct advantages over those shared as a file: